How to Set up Google Search Console: Explained with Images
Google Search Console (GSC) is a powerful tool that helps you understand how your website is performing in Google Search. It provides essential insights like the number of clicks your website gets, the queries people use to find your site, the average position of your website in search results, and your top-ranking pages. By setting up Google Search Console, you gain access to valuable data that can help you optimize your website, improve your rankings, and increase click-through rates (CTR).
This guide will provide clear instructions with images for setting up Google Search Console.
What is Google Search Console?
Google Search Console is a free service offered by Google that helps you monitor, maintain, and troubleshoot your site’s presence in Google Search results. It offers insights such as:
- Search queries: The specific search terms people use to find your site.
- Clicks: The number of clicks your site receives from Google Search results.
- Average Position: The average ranking position of your website in search results.
- Top Pages: The highest-ranking and most-clicked pages on your website.
By analyzing this data, you can adjust and optimize your website to improve your search rankings and user engagement.
How to Set Up Google Search Console?
Step 1: Open Google Search Console
First, open Google Search Console by visiting the following link:
https://search.google.com/search-console/about
You will be prompted to log in using your Google account.
Step 2: Add Your Website

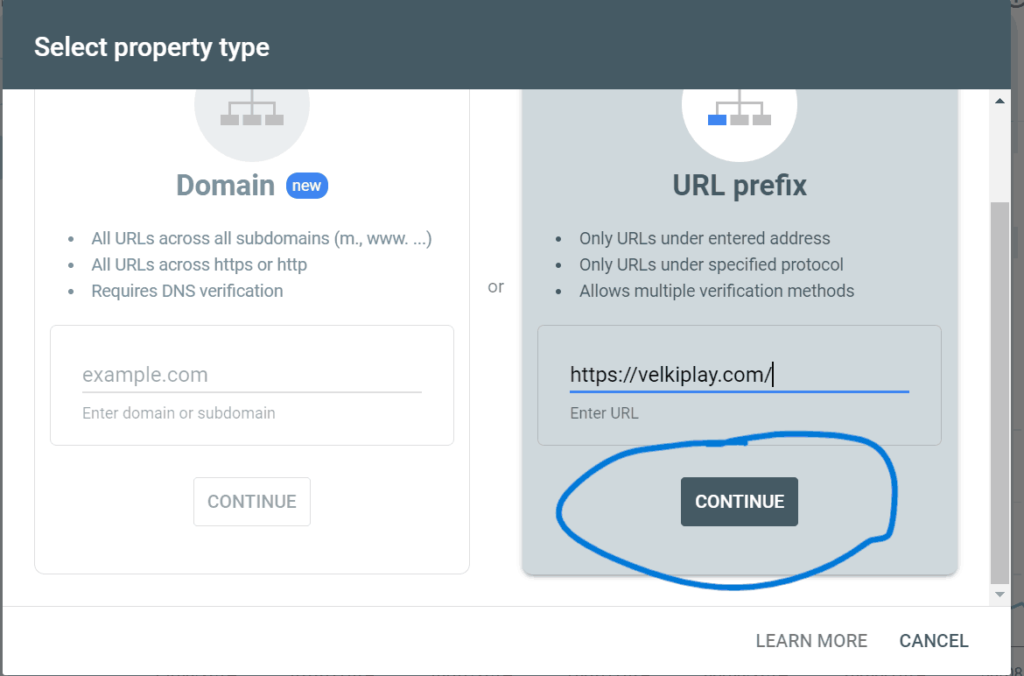
Once logged in, click on the “Add Property” option. You will need to add the full URL of your website. Make sure to choose the “URL Prefix” option, which requires entering the full URL (including “https://” or “http://”).
After entering your URL, click the “Continue” button.
Step 3: Verify Your Ownership
You will be directed to a page asking you to verify your ownership of the website. Google provides multiple verification methods, but for simplicity, we will choose the HTML Tag method.
- Ignore the recommended verification method at the top.
- Scroll down to Other Verification Methods and select “HTML Tag”.
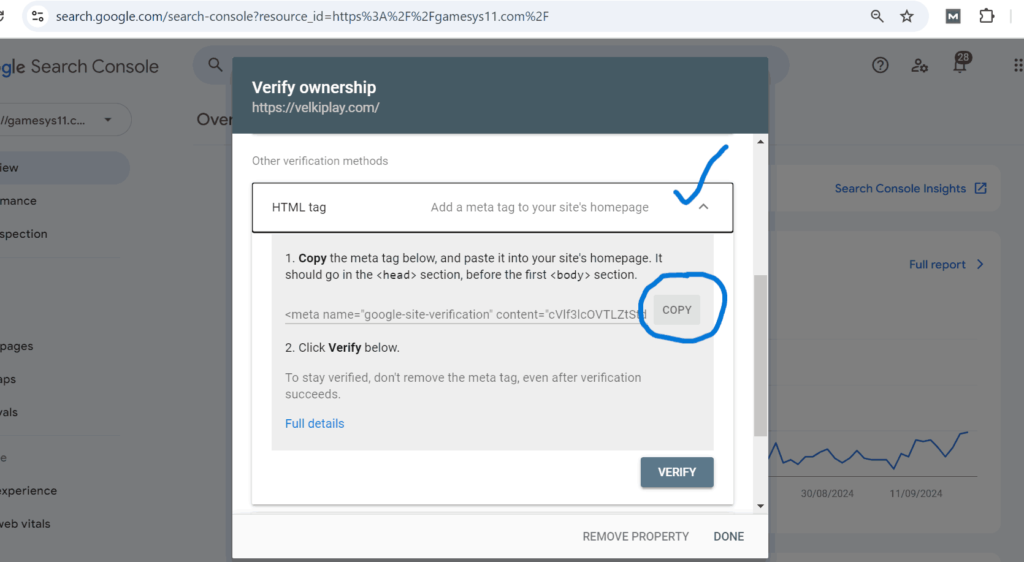
Step 4: Add the HTML Tag to Your Website
Once you select the HTML Tag option, a code will be provided. Copy this code and paste it into the <head> section of your website.
Here’s how to do it:
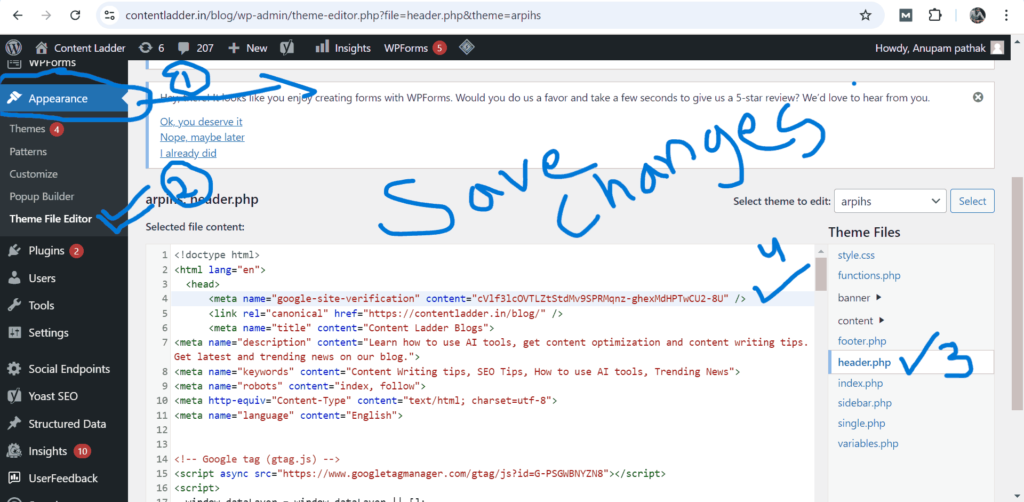
- Open your website’s code or use your website’s CMS (like WordPress).
- Once you login into worpress, click on “appearance” on the left-hand side and then go to the “theme file editor“.
- Search for “header PHP” on the right hand side of the theme file editor.
- Paste the code which you copied just after the head as shown in the image.
- After pasting the code, scroll down to make save changes.
Step 5: Verify Ownership
After pasting the code into your website’s head section, return to Google Search Console and click the “Verify” button.
If everything is set up correctly, you should see a confirmation message indicating successful verification.
Final Thoughts
Congratulations! You have now set up Google Search Console for your website. With access to the insights and data it provides, you can start optimizing your website for better search performance.
By regularly checking your keyword impressions, clicks, and rankings, you can make informed decisions to improve your website’s visibility in search results. Always use the data to refine your SEO strategy and stay ahead of the competition.